The Eclipse IDE
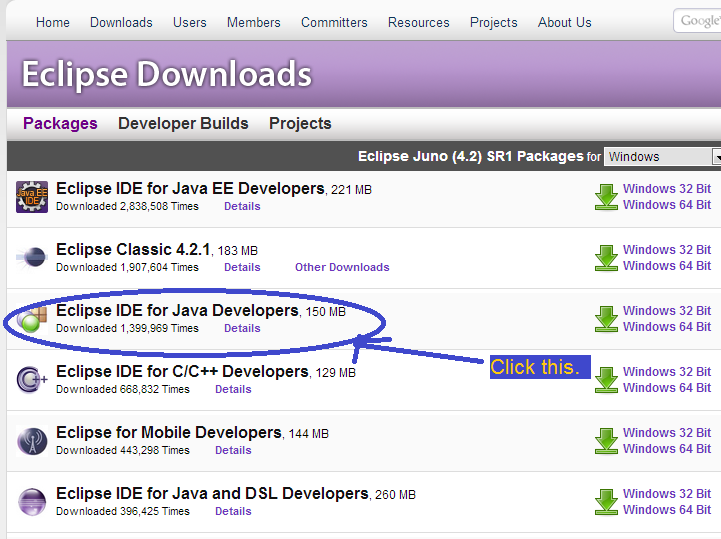
Eclipse is the program we will use to actually write all of our code. The last time I checked (April 2013), the download page was here. If the link is broken for whatever reason, you can just google Eclipse download and the first link will most likely be the download page. We're getting Eclipse IDE for Java Developers.
Again, pick the appropriate link for your OS.

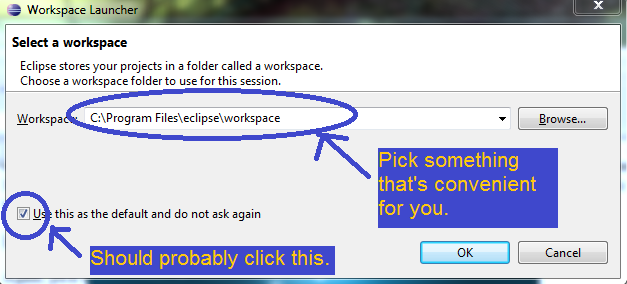
Once it's downloaded, extract the compressed file with your software of choice (I'm partial to 7-Zip). You may want to move the extracted folder somewhere more convenient, like Program Files. Now go ahead and run eclipse.exe. It'll ask you to select a workspace. This is just where you want all your settings, backups, and project files to go. I don't actually use the default here, and prefer to put the workspace inside Eclipse's own directory. Check Use this as the default if you don't want to see this pop-up again (you rarely do).
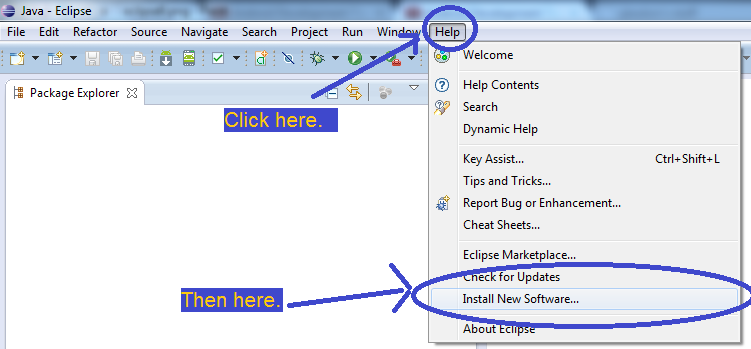
Once it's open, you'll see a welcome screen. Close that. Now we can install the Android Development Tools (ADT) plug-in for Eclipse, which will make creating Android apps in Eclipse much easier. Click Help, then Install New Software...
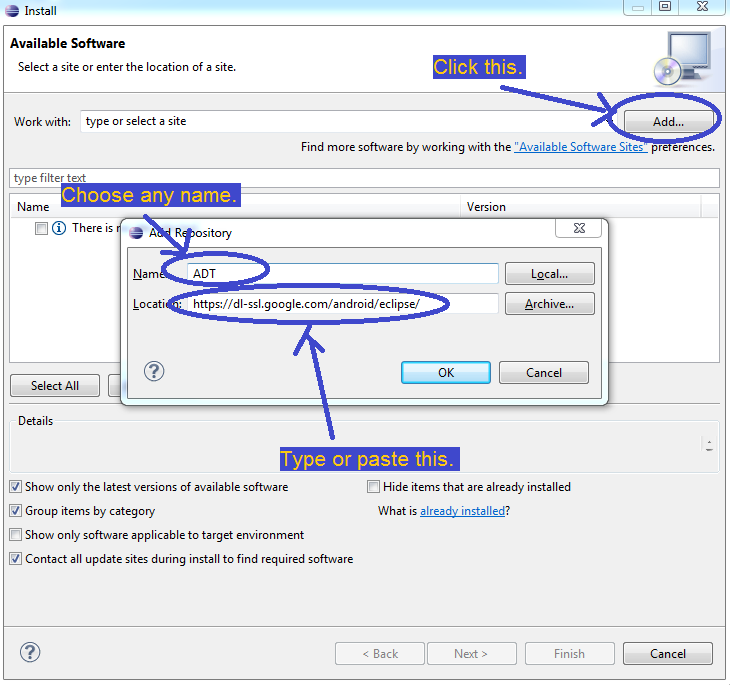
In the window that opens, click Add.... Then put whatever you want for name, and put this for the location: https://dl-ssl.google.com/android/eclipse/.
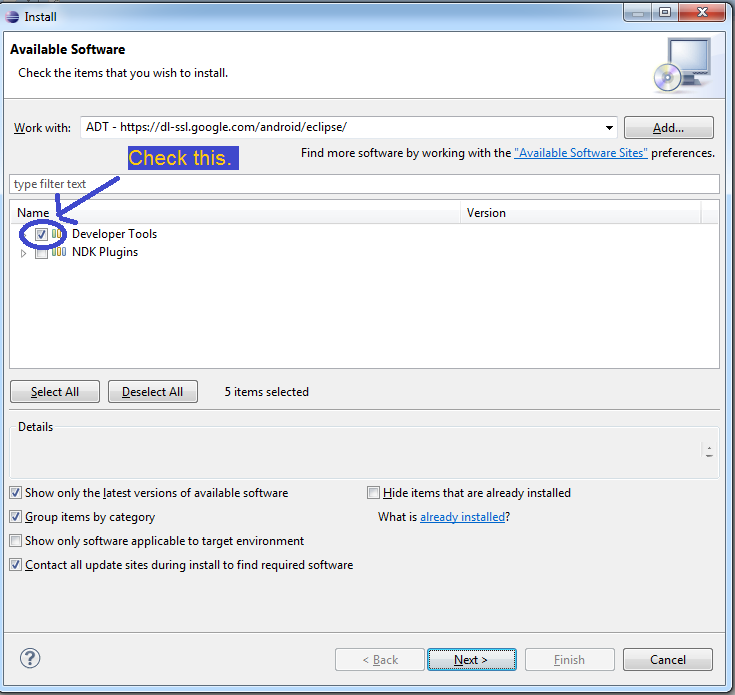
Click OK. It should say Pending... in the window. Wait for it to populate the space. This can take some time. Once it's done, check Developer Tools and click Next. We won't need the NDK plug-ins for the tutorials on this site.
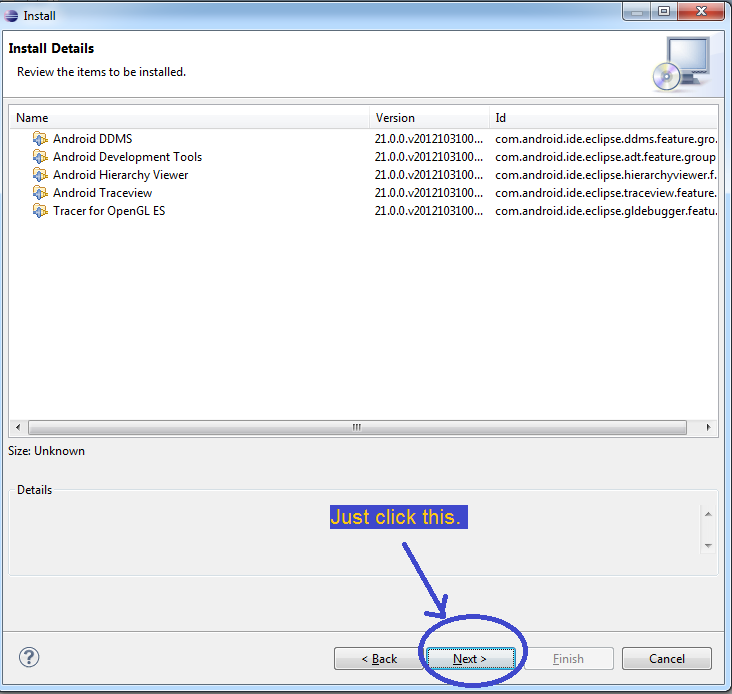
Click Next again on the next screen.
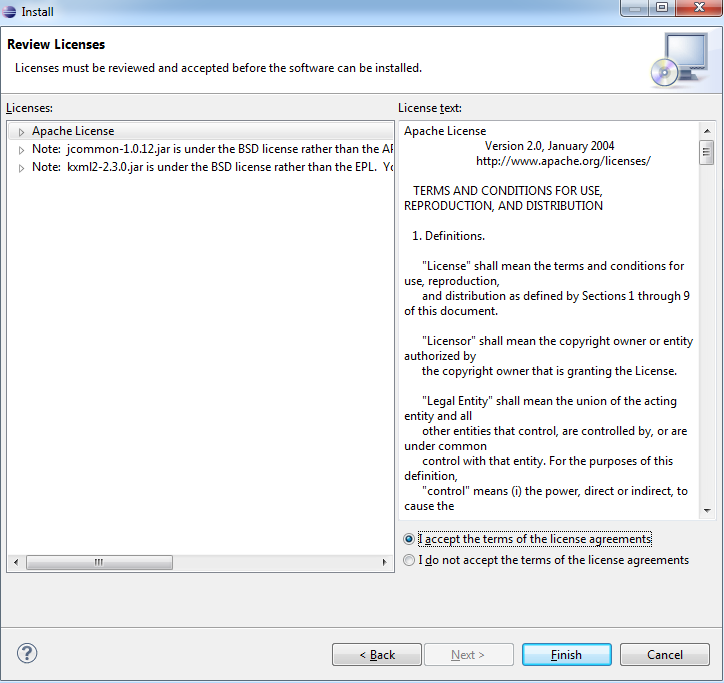
Then skim the terms and conditions before accepting them and clicking Finish.
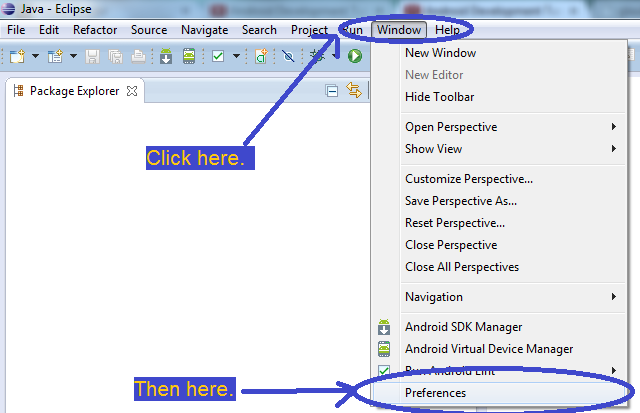
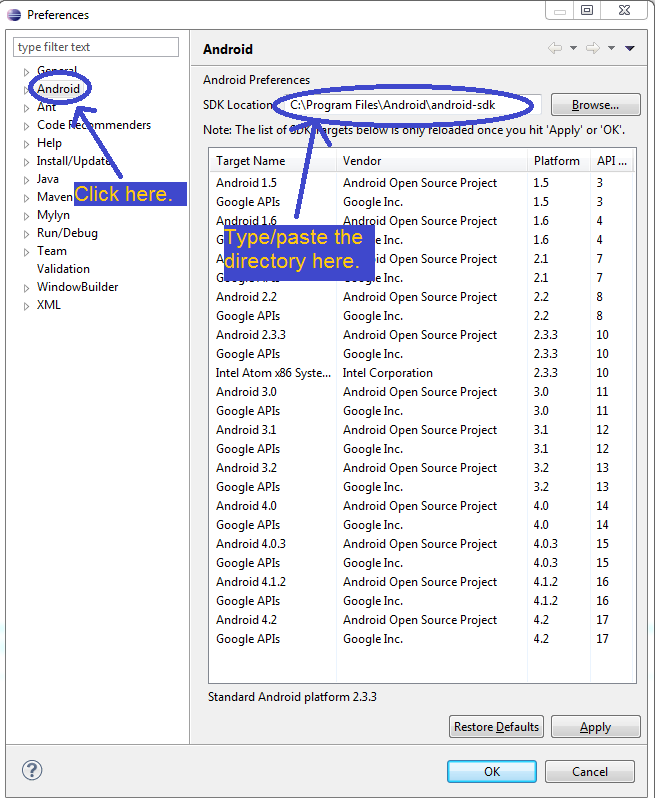
Eclipse will now download the ADT plug-in. Again, prepare to wait a while. You may get a warning about installing software that contains unsigned content. Just hit OK. Eclipse will then ask to restart, so let it. Finally, we need to tell Eclipse where our Android SDK is. When Eclipse is open again, click Windows, then Preferences.
In the Preferences window, select Android. Then type or paste the location of the Android SDK into the field labeled SDK Location. (This might be done for you automagically already).
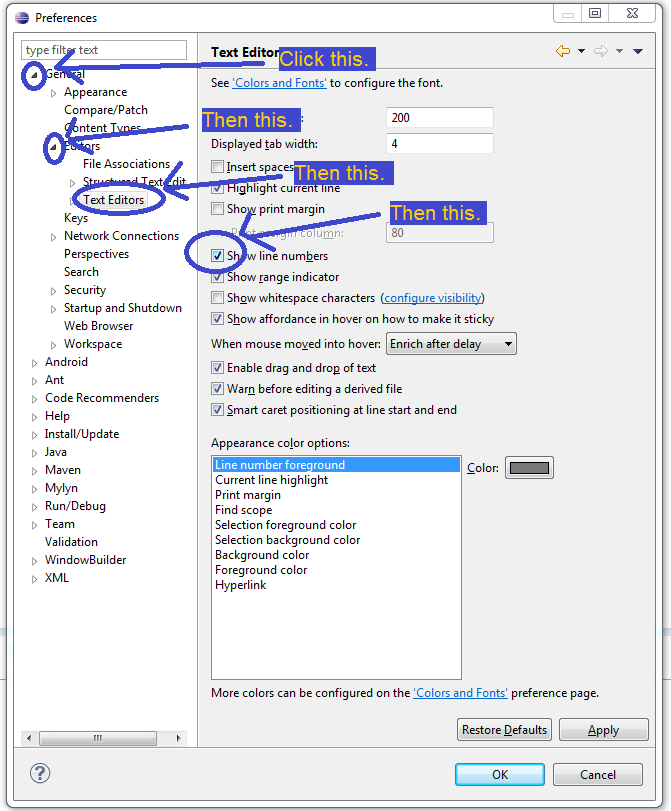
While you're here, there's something else we should take care of. Still in the Preferences window, click the small arrow next to General. Then click the arrow next to Editors. Then select Text Editors, and on the right, check Show line numbers. You'll thank me for this later.
Next, let's set up a few perspectives. Click the Open Perspective button on the top-right. It looks kind of like an IDE. Then select the DDMS perspective and hit OK. Next, click the Open Perspective button again, and this time open the Debug perspective.
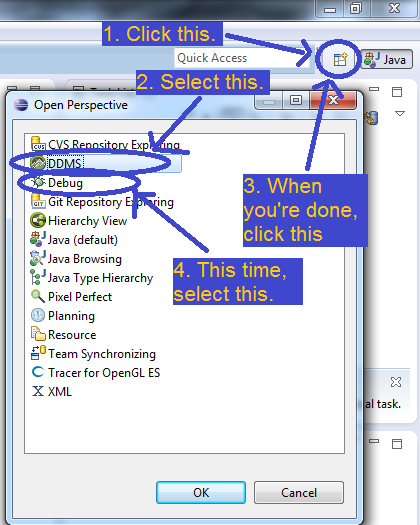
When finished, the top-right of Eclipse should look something like this. We'll occasionally use these other perspectives in the tutorials.

We're almost done. Now we just need to set up an Android Virtual Device (AVD) to use for testing our apps. At the top of Eclipse, click the icon that looks like a cell phone with the Android mascot on the screen. It's kind of hard to describe, so just look at the picture below.
Then click the New... button. Choose whatever name you want, then select the kind of device you want to emulate from the drop-down thing. After selecting one, the rest of the fields should populate automagically. Pick a device that you want to target, so you get to see, as close as possible anyway, what your end-users see. You can also mess around with the options after they get populated. You may want to look into Use Host GPU in particular to speed up the AVD. When you're done, hit OK.
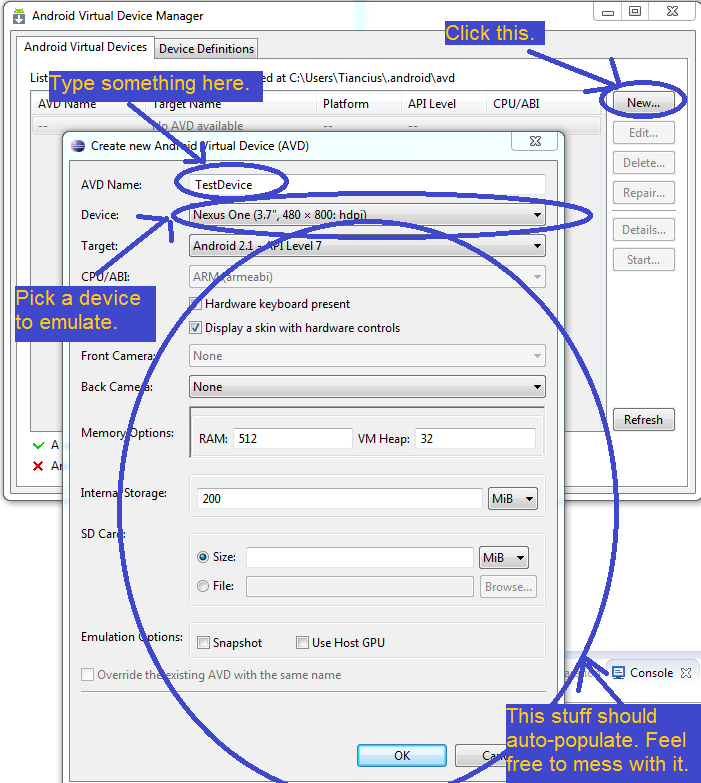
It makes sense to make a few different AVDs with different specs in order to test your apps on a wide range of hardware. So ya, do that if you feel like it. If you have an Android phone, you can also use that to test. The methods for getting it to work with Eclipse varies depending on the phone. Generally, go into the settings on your phone, then go to Developer options, then check USB debugging. Then connect your phone to your computer and it should work like an AVD (except run much faster). If not, look up the specifics for your phone. For instance, I know some Samsung phones require you to install Kies to work.
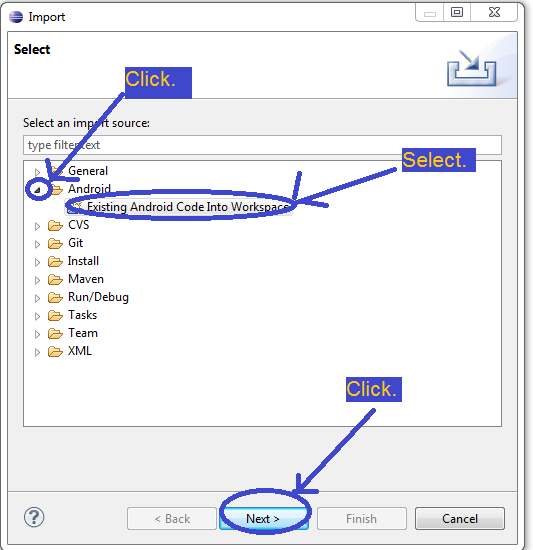
Now, I know I said this was the last thing we had to do, but before we end this, we should probably test everything one more time to make sure all is well. To do this, let's run my tip calculator app. You can download the source here. Once you have it, extract it, and remember where the folder is. Then go to Eclipse and click File, then Import...

Click the arrow next to the Android folder, select Existing Android Code Into Workspace, then hit the Next button.
Put the directory of my tip calculator in the Root Directory field. Then check Copy projects into workspace.
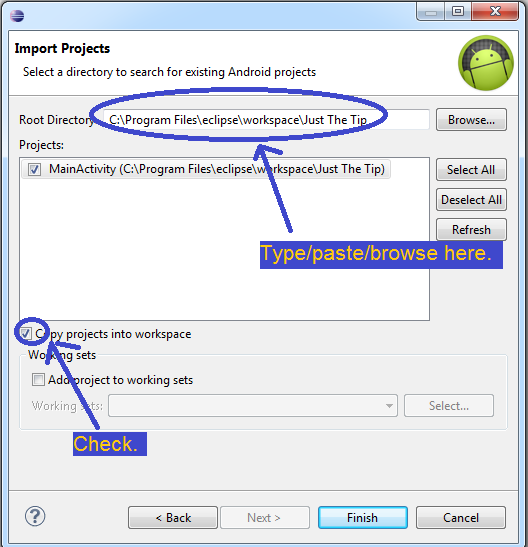
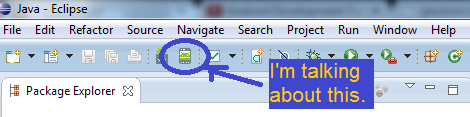
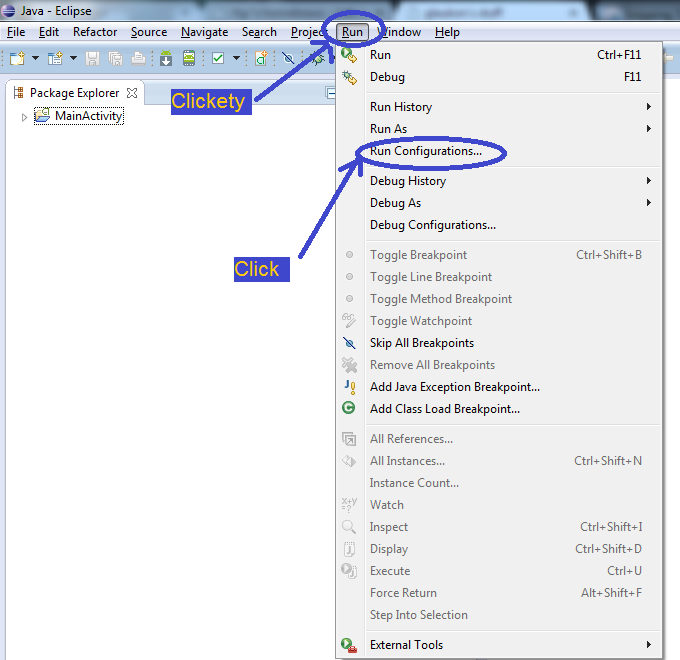
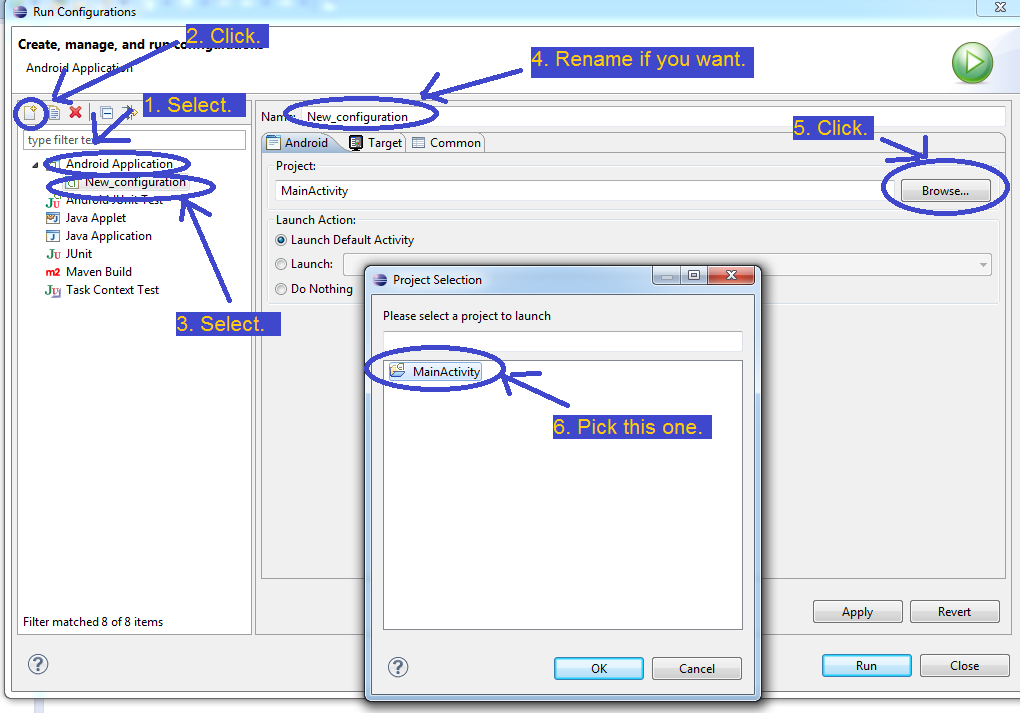
Once you hit finish, you should see MainActivity in the Package Explorer to the left. Before we can run it, we need to set a run configuration. Click Run, then Run Configurations...
Select Android Application on the left, and then click the New launch configuration button above it (it looks like a blank sheet of paper). Then select the new configuration you just created. You can now edit the properties on the right. Change the name if you want. For the Project field, click Browse... and choose MainActivity.
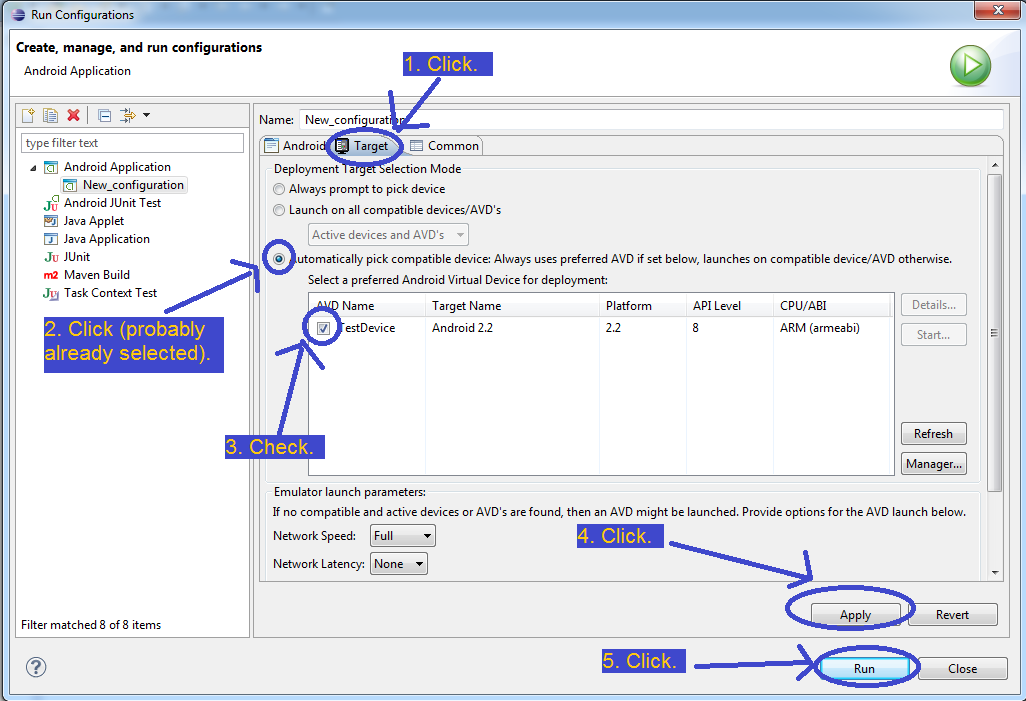
Then move on to the Target tab. Click the AVD you created earlier. Then click Apply. Then Run. (If you made multiple AVDs, you may prefer to select Always prompt to pick device. It does what it sounds like it does.)
If everything is as it should be, the AVD should pop-up. It'll take a long time to load. Like seriously, if you wait 10 minutes, and it still doesn't look like it has finished loading, don't just assume the program froze. It might have. But it might also just be taking that long to load. I hate it. But when it does finish, you should see this:
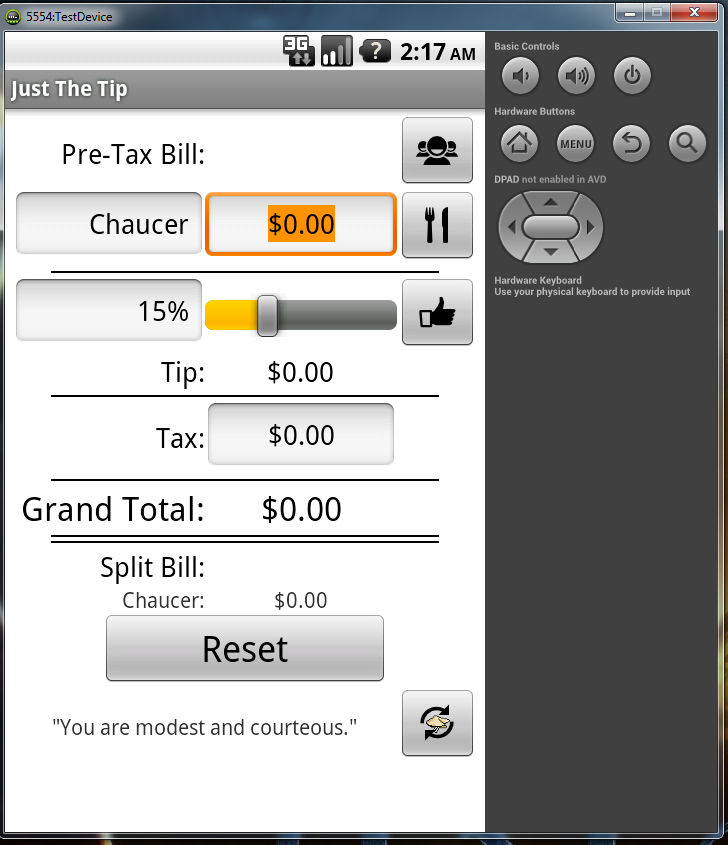
If you do, excellent, everything is up and running and you're ready to develop for Android, as well as complete any Android tutorial on this site. Don't worry about the AVD being slow, it's not your computer, the AVD just sucks like that. If something else seems off, try and see where you diverged from this tutorial. If you did everything the same as me, try Googling the error or problem you got in order to fix it. Alternatively, you can email me at glaukon@glaukon.com.
Told you this would be quick*.
Glossary
ADT: The Android Development Tools plug-in is a plug-in for Eclipse that makes it much easier to write Android programs.
AVD: An Android Virtual Device is an emulator for a real Android phone. It simulates how your program would run on a real phone.
Perspective: A perspective is just a set of views, or windows, in the Eclipse user interface. Different perspectives are useful for different things. The Debug perspective, for instance, has views that help you debug your programs.